
Lemon Lavender Cookies Recipe
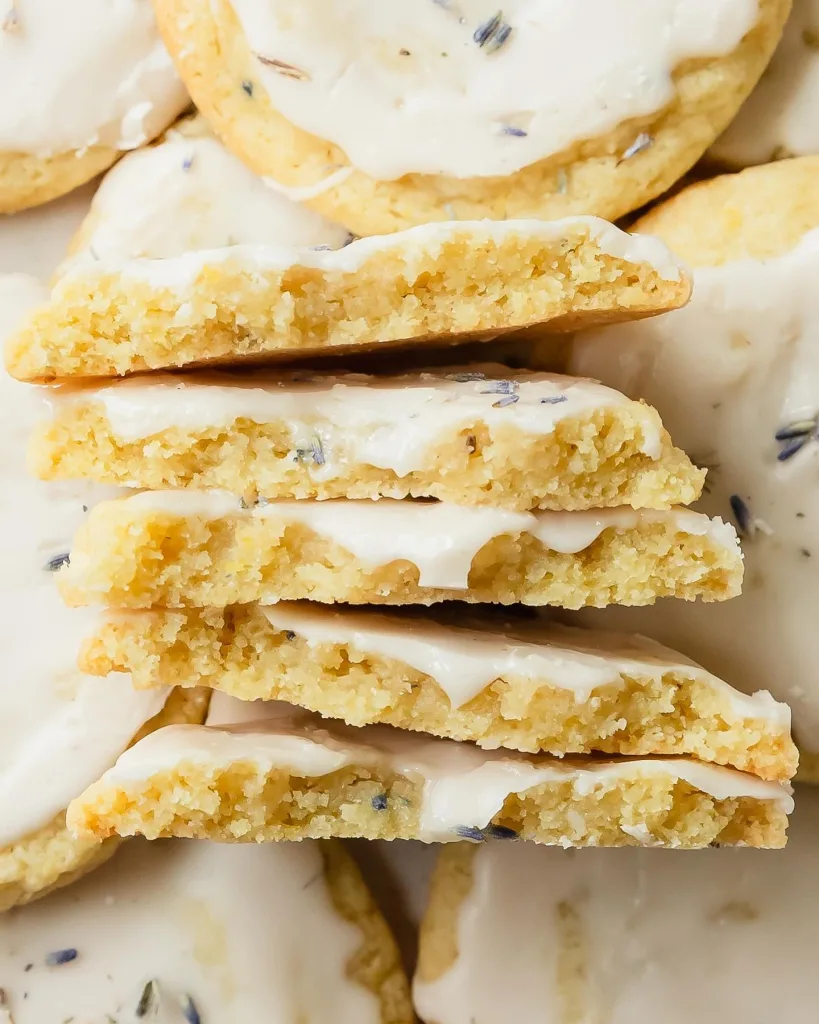
I just pulled the last batch out of the oven, and honestly, I can’t stop sneaking bites straight off the cooling rack. These lemon lavender cookies have quickly become one of my all-time favorites to bake and they’re soft, buttery, and just floral enough to feel special without being overpowering.
I first made them on a slow Sunday afternoon, and the kitchen smelled absolutely incredible. If you’re looking for a cookie that feels a little fancy but comes together with pantry staples, this one is it. I hope you love making (and eating) them as much as I do!

Ingredients
Here are the some ingredients for making lemon lavender cookies
- 2 sticks (226g) unsalted butter, softened: use room-temperature butter here for the best creamy texture when creaming with the sugar.
- 1½ cups (298g) granulated sugar: this gives the cookies their classic sweetness and helps create those slightly crisp edges.
- 2 large eggs: bring these to room temperature alongside your butter for a smoother dough.
- 2 tsp vanilla extract: pure vanilla extract makes a noticeable difference in flavor depth; skip the imitation if you can.
- Zest of 1 lemon: use a microplane for the finest zest and the most fragrant result. Only zest the yellow part, not the bitter white pith.
- 1 tbsp lemon juice: freshly squeezed is best; it brightens the whole cookie.
- 2¾ cups (330g) all-purpose flour: spoon and level your flour rather than scooping directly from the bag to avoid a dense cookie.
- ½ tsp baking soda: works with the baking powder to give these cookies a gentle lift.
- ½ tsp baking powder: helps the cookies puff slightly before spreading.
- ¾ tsp salt: don’t skip it! Salt balances the sweetness and enhances both the lemon and lavender flavors.
- 2 tsp dried lavender: culinary-grade lavender only. Regular dried lavender sold for crafts or potpourri is not food-safe and can taste soapy.
For the lemon glaze:
- ½ cup (57g) powdered sugar: sifted for a smooth, lump-free glaze.
- 1 tbsp lemon juice: freshly squeezed for the brightest citrus flavor.
- Heavy cream as needed: add a teaspoon at a time to reach a drizzleable consistency.
Note: This recipe makes 24 cookies.
Variations
This dish is wonderful as is, but feel free to make it your own with these simple variations.
- Dairy-Free: Swap the unsalted butter for a high-quality vegan butter like Miyoko’s or Earth Balance. The texture stays soft, though the cookies may spread slightly more. Skip any heavy cream in the glaze and use oat milk instead.
- Sugar-Free: Replace the granulated sugar with a 1:1 granulated monk fruit sweetener. For the glaze, use powdered monk fruit sweetener in place of powdered sugar. The cookies will be slightly less chewy but still delicious.
- Flavor-Enhancing Add-Ins: Try folding in ½ cup of white chocolate chips for extra sweetness, a teaspoon of lemon extract alongside the vanilla for an even bolder citrus punch, or a pinch of culinary rose petals for a romantic twist on the floral notes.
Cooking Time
- Prep Time: 20 minutes (plus 30 minutes chill time)
- Cooking Time: 10–12 minutes
- Total Time: 1 hour
Equipment You Need
- Stand mixer or hand mixer: for creaming the butter and sugar to the right fluffy consistency
- Large mixing bowl: for combining your wet and dry ingredients
- Medium mixing bowl: for whisking together the dry ingredients before adding to the batter
- Microplane or zester: for getting fine, fragrant lemon zest
- Baking sheets: you’ll need at least two for a batch of 24 cookies
- Parchment paper or silicone baking mats: prevent sticking and promote even baking
- Cookie scoop (medium, about 1.5 tbsp): for evenly sized cookies that bake at the same rate
- Wire cooling rack: allows air circulation so the cookies cool evenly and don’t go soggy on the bottom
- Small bowl and whisk: for mixing the lemon glaze
How to Make Lemon Lavender Cookies?
Creating homemade Lemon Lavender Cookies might seem complex, but it’s a simple and rewarding process.
Step 1: Whisk the Dry Ingredients
In a medium bowl, whisk together the all-purpose flour, baking soda, baking powder, salt, and dried lavender. Set this aside. Whisking rather than stirring ensures the leavening agents are evenly distributed throughout the flour, which means a more consistent rise across the whole batch.
Step 2: Cream the Butter and Sugar
In a large bowl using a stand mixer or hand mixer, beat the softened butter and granulated sugar together on medium-high speed for about 3 minutes, until the mixture is light, pale, and fluffy. Don’t rush this step — proper creaming creates air pockets in the dough that result in a softer, more tender cookie. Scrape down the sides of the bowl halfway through.
Step 3: Add the Eggs, Vanilla, and Lemon
Add the eggs one at a time to the butter mixture, beating well after each addition. Then mix in the vanilla extract, fresh lemon juice, and lemon zest. The dough may look slightly curdled at this point — that’s completely normal. It will come together once the flour is added.
Step 4: Combine Wet and Dry Ingredients
With the mixer on low speed, gradually add the dry ingredient mixture to the wet ingredients in two or three additions. Mix until just combined — overmixing at this stage can make your cookies tough. The dough should be soft and slightly sticky, with flecks of lavender and lemon zest visible throughout.
Step 5: Chill the Dough
Cover the bowl with plastic wrap and refrigerate the dough for at least 30 minutes. This step is non-negotiable for the best texture — chilling firms up the fat so the cookies hold their shape and bake up thick and soft rather than flat and spread-out. Use this time to preheat your oven to 350°F and line your baking sheets with parchment paper.
Step 6: Scoop and Bake
Using a medium cookie scoop, portion the dough onto your prepared baking sheets, spacing the cookies about 2 inches apart to allow for spreading. Bake for 10–12 minutes, until the edges are just set and the tops look barely done — they’ll continue to firm up as they cool. Remove from the oven and allow the cookies to cool on the baking sheet for 5 minutes before transferring to a wire rack.
Step 7: Make the Lemon Glaze
While the cookies cool, whisk together the powdered sugar and lemon juice in a small bowl. Add heavy cream a teaspoon at a time until the glaze reaches a thin, drizzleable consistency. It should flow off the whisk in a slow, steady ribbon. Once the cookies are fully cooled, drizzle the glaze over each one using a spoon or a piping bag.

Additional Tips for Making this Recipe Better
After making these Lemon Lavender Cookies a few times, I’ve discovered a few things that help make them even more delicious.
- I always let my butter and eggs come to room temperature for at least an hour before I start baking. Cold butter doesn’t cream properly and leads to a dense, uneven dough.
- Don’t skip measuring your flour by weight if you have a kitchen scale. I’ve made these cookies both ways, and the weight measurement gives me far more consistent results every single time.
- I press one or two extra dried lavender buds gently onto the top of each cookie right before baking — it makes them look bakery-beautiful and adds a little extra floral flavor on the surface.
- Pull the cookies out when they still look underdone in the center. I learned this the hard way — they continue cooking on the hot pan for several minutes after coming out of the oven, and the residual heat is what gives them that perfect soft center.
- For the glaze, I recommend waiting until the cookies are completely cool before drizzling. I got impatient once and drizzled too early — the glaze just melted straight off. Patience is worth it here.
How to Serve Lemon Lavender Cookies
These cookies are lovely on their own, but a few small touches can turn them into something truly special. Serve them stacked on a white ceramic plate or tiered cake stand and finish each one with a light dusting of powdered sugar just before serving for an elegant look. For extra visual appeal, press a small sprig of fresh or dried lavender alongside the glaze drizzle while it’s still wet and it sets beautifully and photographs wonderfully.

Nutritional Information
Here’s a quick breakdown of the nutrition per cookie (based on 24 cookies per batch):
- Calories: Each cookie comes in at 132 kcal — a satisfying sweet treat without going overboard
- Protein: 0.6g per cookie
- Carbohydrates: 15.2g per cookie
- Fat: 8.1g per cookie
Make Ahead and Storage
Lemon Lavender Cookies are great for making in a big batch to enjoy later. Proper storage is key to keeping them fresh.
- Storing: Once glazed and fully set, store the cookies in an airtight container at room temperature for up to 5 days. Layer them between sheets of parchment paper to prevent the glaze from sticking. They actually get even softer on day two as the flavors meld together — if they last that long!
- Freezing: These cookies freeze beautifully. Place unglazed, fully cooled cookies in a single layer on a baking sheet and freeze until solid, then transfer to a zip-lock freezer bag or airtight container for up to 2 months. Thaw at room temperature for about an hour before adding the glaze and serving. You can also freeze the raw dough — scoop into balls, freeze on a tray, then store in a bag for up to 3 months. Bake straight from frozen, adding 1–2 extra minutes to the bake time.
- Reheating: If you prefer your cookies warm, pop them in a 300°F oven for about 5 minutes. Skip the microwave if you can — it tends to make the edges rubbery. A brief oven warm-up revives that just-baked softness perfectly without affecting the glaze.
Why You’ll Love This Recipe
These lemon lavender cookies are genuinely one of those recipes worth bookmarking for keeps. Here’s why they’ll earn a permanent spot in your rotation:
- They’re soft, buttery, and perfectly balanced. The lavender adds a gentle floral note without being overwhelming, while the lemon zest and juice keep everything feeling bright and fresh. The combination is elegant but never fussy — and the glaze ties it all together beautifully.
- The recipe is beginner-friendly but impressive. There’s no chilling overnight, no special equipment, and no complicated techniques. Cream, mix, chill, bake — that’s it. Yet the final result looks and tastes like something from a specialty bakery.
- They’re highly adaptable. Whether you want to make them dairy-free, lower-sugar, or add in white chocolate chips, this dough holds up beautifully to variations. It’s a reliable base recipe you can make your own.
- They bake up consistently every time. Thanks to the 30-minute dough chill and a straightforward bake time, these cookies don’t require constant watching or complicated timing. You get reliably thick, soft, golden cookies with every single batch.
- They’re made to share. This recipe yields 24 cookies — plenty for a party, a gift box, or a week of afternoon treats. They travel well and keep nicely, making them one of the easiest baked goods to bring to any gathering.