
Pumpkin Patch Strawberries Recipe
I made these adorable Pumpkin Patch Strawberries for a festive fall party recently, and they were an absolute hit with both kids and adults. After preparing this recipe myself, I can tell you that combining juicy, ripe strawberries with a sweet orange candy shell over a bed of crushed chocolate cookies creates the ultimate autumn dessert tray.
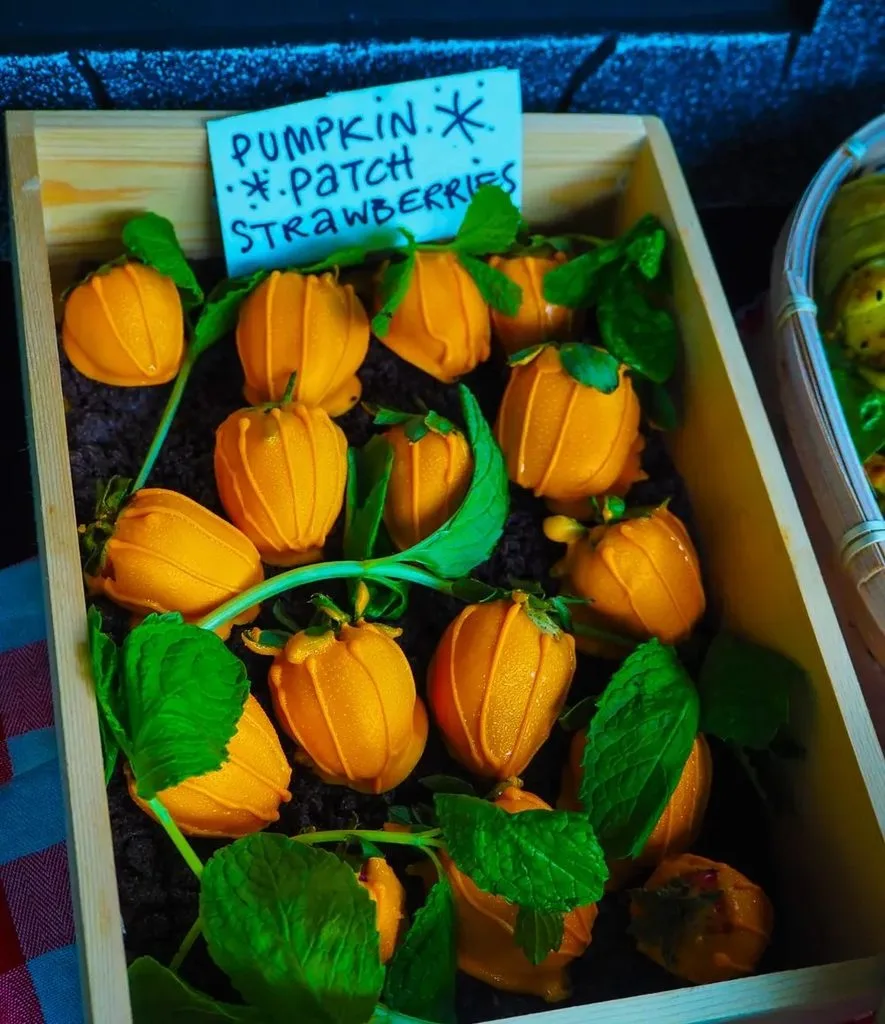
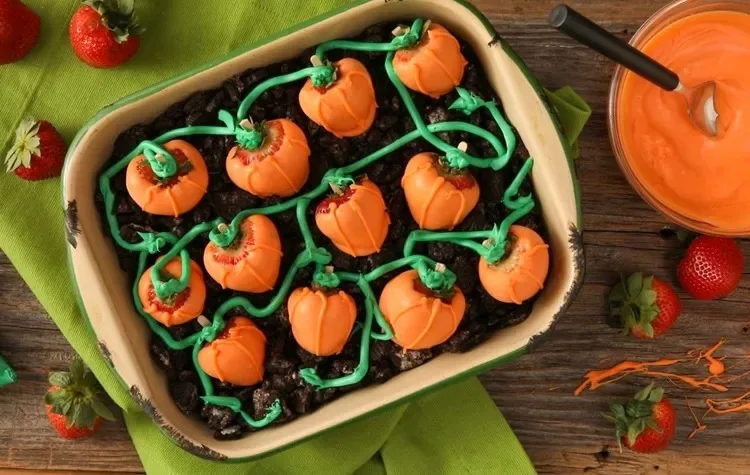
The crushed chocolate cookies look just like rich garden soil, while the dipped orange strawberries nestled inside look exactly like a tiny, edible pumpkin patch. I was so amazed by how effortlessly piping green frosting vines ties the whole presentation together into a bakery-worthy centerpiece.

Ingredients
Here is everything you will need to assemble this creative fall dessert, along with pro tips on why each component works so well.
- 24 strawberries – choose fresh, firm strawberries with bright green stems to ensure they hold up well when dipped and handled.
- 1 (12-oz.) pkg. orange candy coating – melted; coats the fresh berries in a smooth, bright orange candy shell that sets firm.
- 1 (14.3-oz.) pkg. chocolate sandwich cookies with white filling – crushed finely; serves as the sweet, rich “dirt” foundation for planting your strawberry pumpkins.
- Green frosting – transferred to a piping bag to create leafy accents and connecting vines across the cookie soil.
Note: Serves 8 as a fun, interactive party dessert platter (yields 24 dipped strawberries).
Variations
If you want to customize this festive dessert for different dietary preferences or visual styles, give these simple ingredient swaps a try.
- Gluten-Free Option: Use certified gluten-free chocolate sandwich cookies for the crushed soil base to accommodate gluten sensitivities.
- Dark Chocolate Dirt Patch: Add a handful of dark chocolate chips or cocoa powder to the crushed cookie base for an even richer chocolate soil effect.
- White Chocolate Ghost Berries: Dip half of the berries in melted white candy coating and draw candy eyes using black gel to add tiny ghosts into your pumpkin patch!
Cooking Time
Planning your dessert assembly is completely simple with this quick time breakdown.
- Prep Time: 20 minutes
- Cooking Time: 0 minutes
- Total Time: 35 minutes (includes 15 minutes setting time)
Equipment You Need
Having these basic kitchen tools ready before you begin will make dipping, crushing, and piping your strawberries completely smooth.
- Baking sheet & waxed paper – provides an easy, non-stick surface for the orange-dipped strawberries to set completely firm.
- Resealable plastic bag or piping bag – used for drizzling orange candy lines and piping green frosting vines cleanly.
- Shallow serving dish or platter – holds the crushed chocolate cookie soil and displays the finished pumpkin patch.
- Food processor or zip-top bag with rolling pin – quickly crushes the chocolate sandwich cookies into fine crumbs.
How to Make Pumpkin Patch Strawberries?
Creating picture-perfect pumpkin patch strawberries relies on drying your berries thoroughly before dipping and letting the candy coat set firm. By planting the dipped berries directly into crushed cookie soil and piping connecting green vines, you achieve a delightful, garden-inspired presentation.
Prepping and Drying the Strawberries
Rinse the 24 fresh strawberries thoroughly under cool water. Pat them completely dry on all sides using paper towels, taking extra care around the leafy green caps so no moisture remains. Line a large baking sheet with waxed paper or parchment paper and set aside.
Dipping and Drizzling the Berries
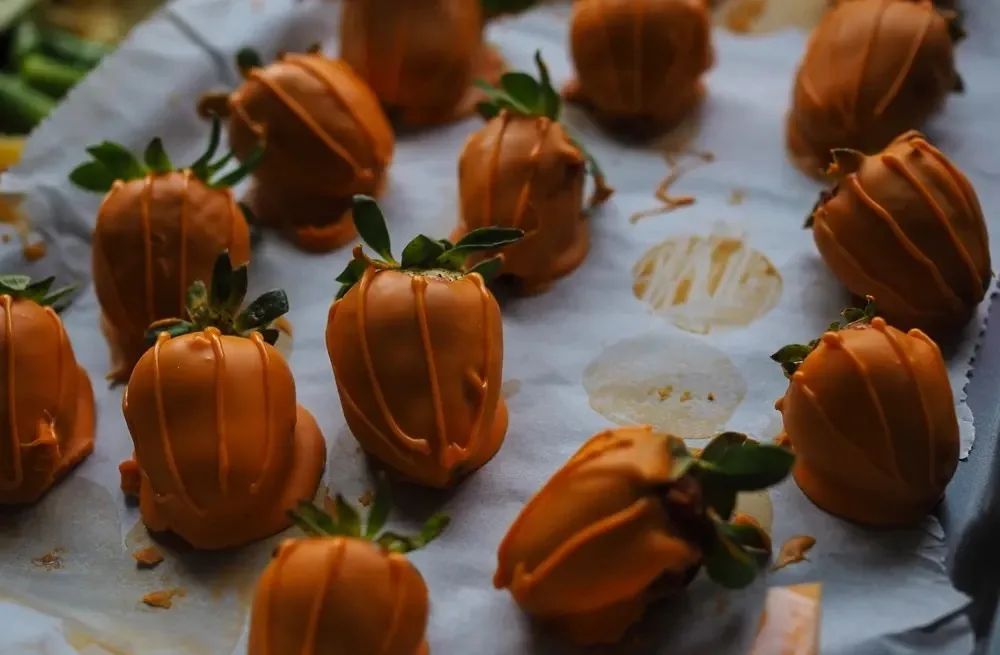
Melt the 12-oz. package of orange candy coating in a heatproof bowl according to package directions until smooth. Holding each strawberry by its green stem, dip into the melted orange coating to cover completely, then place onto the prepared baking sheet. Transfer any remaining melted orange coating into a small resealable plastic bag, snip a tiny corner off, and drizzle thin lines back and forth over the set berries to create textured pumpkin ridges; allow to set completely.
Assembling the Cookie Soil
Crush the entire 14.3-oz. package of chocolate sandwich cookies into fine crumbs using a food processor or by sealing them in a bag and rolling with a rolling pin. Transfer the crushed cookie crumbs into a wide, shallow serving dish or platter, spreading them out into an even layer to resemble dark garden soil.
Planting the Patch and Piping Vines
Gently press the set orange-dipped strawberries cut-side down into the chocolate cookie crumbs so they stand upright like growing pumpkins. Fit a piping bag with green frosting (or use a small plastic bag with the corner snipped) and pipe green frosting vines connecting the strawberries across the cookie dirt, adding small leaf squiggles near the stems before serving.
Additional Tips for Making this Recipe Better
Here are a few personal observations and tricks I learned while assembling this dessert tray that will help you achieve absolute perfection in your own kitchen.
- I always make sure the strawberries are at room temperature before dipping because cold berries straight from the fridge can cause the warm candy coating to crack as it sets.
- In my experience, keeping the green leafy stems intact gives you a natural handle for dipping and adds an authentic top to your candy pumpkins.
- I love using a leaf piping tip for the green frosting to create realistic pumpkin leaves right beside the piped vines.
- Whenever I make these, I make sure to assemble the patch in the serving dish right before the party so the chocolate cookie crumbs stay crisp under the berries.
How to Serve Pumpkin Patch Strawberries?
Present this sweet, edible garden patch in a wide ceramic dish or rustic wooden tray so guests can admire the vibrant orange strawberries nestled in chocolate soil. Set out small tongs or let guests lift the strawberry pumpkins straight out of the cookie dirt by their green stems. Serve alongside a bowl of extra crushed cookies or vanilla ice cream for a delightful autumn dessert pairing.
Nutritional Information
Here is a quick overview of the estimated key nutritional metrics per serving (3 strawberries with cookie soil) for this recipe.
- Calories: 280 kcal
- Protein: 3 g
- Carbohydrates: 42 g
- Fat: 12 g
Make Ahead and Storage
Managing your party prep work or storing leftover candy-dipped berries is simple when following these easy guidelines.
Room Temperature Storage
Keep the assembled Pumpkin Patch Strawberries at room temperature in a cool area for up to 4 hours during serving. Avoid leaving candy-coated berries in warm sunlight or near heat sources to prevent the coating from softening.
Refrigerator Guidelines
Store leftover dipped strawberries in a single layer on a parchment-lined dish inside the refrigerator for up to 2 days. Keep the cookie crumbs stored separately in an airtight container at room temperature so they remain crunchy.
Freezing Process
It is best to avoid freezing fresh candy-dipped strawberries! As frozen strawberries thaw, they release moisture that dissolves the chocolate cookie soil and causes the candy shell to slip off.
Reheating Instructions
No reheating needed! Always serve your Pumpkin Patch Strawberries at room temperature or slightly chilled for the best sweet crunch and juicy fruit flavor.
Why You’ll Love This Recipe?
You are going to fall in love with how effortlessly this creative recipe turns everyday fruit and cookies into a festive fall masterpiece.
- Fun Festive Presentation: Crushed cookie soil and green frosting vines transform simple dipped berries into an eye-catching pumpkin patch.
- Delicious Flavor Balance: Combines juicy, fresh strawberries with sweet orange candy and rich, crunchy chocolate sandwich cookies.
- Quick No-Bake Prep: Requires zero oven baking time, making it an easy project to assemble with kids or for last-minute gatherings.
- Perfect Party Centerpiece: Makes a memorable, interactive dessert platter for Halloween parties, autumn potlucks, and Thanksgiving tables.


