
Red Velvet Cheesecake Thumbprints Recipe
The first time I baked a batch of these Red Velvet Cheesecake Thumbprints for a holiday gathering, they were completely gone before I even set down the second platter! I wanted a bite-sized dessert that combined the iconic cocoa-vanilla punch of classic red velvet cake with a silky, cheesecake-style filling, and this recipe delivered beyond my expectations.
The soft, buttery cookies melt in your mouth while the tangy cream cheese center gives every single bite that decadent bakery feel. My family and friends ask me to make these every single year!
Ingredients
Using pure cocoa, fresh dairy, and quality vanilla ensures a tender cookie crumb with a rich, tangy cream cheese core.
For the Red Velvet Cookie Dough
- 1 cup unsalted butter, softened. Softened butter creams effortlessly with sugar to build a tender, melt-in-your-mouth cookie texture.
- 1/2 cup granulated sugar. Sweetens the base dough while helping create delicately crisp outer edges.
- 1/2 cup light brown sugar, packed. Keeps the cookies soft and chewy with a subtle caramel undertone.
- 1 large egg yolk, room temperature. Adds moisture and structure to bind the dough without causing the thumbprints to spread too thin.
- 1 teaspoon pure vanilla extract. Adds classic bakery warmth and enhances the subtle chocolate notes.
- 1 tablespoon red gel food coloring. Gel food coloring provides a deep, vibrant red hue without watering down your cookie dough.
- 2 cups all-purpose flour. Standard all-purpose flour gives the cookies just enough structure to hold their thumbprint well.
- 3 tablespoons unsweetened cocoa powder. Pure cocoa powder adds that signature mild chocolate flavor essential to red velvet.
- 1/4 teaspoon salt. A small pinch of salt balances the sweet sugar and highlights the rich cocoa.
For the Cheesecake Filling
- 4 ounces full-fat cream cheese, softened. Full-fat brick cream cheese creates a rich, velvety center that sets beautifully inside the cookie well.
- 1/4 cup powdered sugar. Sweetens the cream cheese filling smoothly without leaving any gritty texture.
- 1/2 teaspoon pure vanilla extract. Rounds out the tangy cheese filling with smooth, warm vanilla flavor.
Note: Serves 24 individual thumbprint cookies.
Variations
Customize these colorful thumbprint cookies with easy ingredient swaps or festive toppings to suit any occasion.
- Gluten-Free Alternative: Replace the all-purpose flour with a 1:1 gluten-free measure-for-measure baking flour blend.
- Chocolate Drizzle Finish: Drizzle melted white chocolate or semi-sweet chocolate over the cooled cookies right before serving.
- Nutty Crust Twist: Roll the dough balls in finely chopped pecans or walnuts before pressing the thumbprint wells for extra crunch.

Cooking Time
This quick and easy recipe requires minimal prep and bakes in short bursts in your oven.
- Prep Time: 20 minutes
- Cooking Time: 12 minutes
- Total Time: 1 hour 32 minutes (includes 1 hour of chilling time)
Equipment You Need
Having these basic baking tools ready will ensure your cookie dough comes together effortlessly.
- Electric Stand Mixer or Hand Mixer: Easily creams the softened butter, sugars, and tangy cheesecake filling until fluffy and smooth.
- Baking Sheets and Parchment Paper: Keeps the delicate cookies from sticking to the tray while ensuring an even bake.
- 1/2 Teaspoon or Teaspoon Measuring Spoon: Perfect for pressing neat, uniform indentations into the center of each dough ball.
- Piping Bag or Small Spoon: Used to easily fill each cookie well with the smooth cream cheese mixture without making a mess.
- Wire Cooling Rack: Allows air to circulate around the baked cookies so they cool completely without getting soggy bottoms.
How to Make Red Velvet Cheesecake Thumbprints Recipe?
Follow these step-by-step instructions to mix your vibrant red dough, pipe the cream cheese filling, and bake perfect thumbprints.
Prepping Dry Ingredients and Oven
Preheat your oven to 350°F (175°C) and line two large baking sheets with parchment paper. In a medium bowl, whisk together the all-purpose flour, unsweetened cocoa powder, and salt until evenly combined and set aside.
Mixing the Red Velvet Dough
In a large bowl, beat the softened butter, granulated sugar, and packed light brown sugar together on medium speed for 2 minutes until light and fluffy. Beat in the egg yolk, pure vanilla extract, and red gel food coloring until fully incorporated into a vibrant red batter. Gradually mix in the dry flour mixture on low speed just until a soft dough forms.
Shaping and Pressing the Thumbprints
Scoop tablespoon-sized balls of dough and roll them smooth between your palms. Place the balls 2 inches apart on your prepared baking sheets, then use the back of a round 1/2 teaspoon measuring spoon (or your thumb) to gently press a deep well into the center of each dough ball. Chill the shaped dough trays in the fridge for 30 minutes to firm up.
Filling and Baking the Cookies
While the dough chills, beat the softened cream cheese, powdered sugar, and vanilla extract together in a bowl until silky smooth. Transfer the filling to a piping bag or small spoon and fill each chilled cookie indentation. Bake for 10 to 12 minutes until the edges are set and the cheesecake centers are slightly puffed; let cool on the pan for 10 minutes before moving to a wire rack.

Additional Tips for Making this Recipe Better
A few personal baking secrets I rely on in my kitchen to guarantee your thumbprints turn out picture-perfect every time.
- Use gel food coloring instead of liquid: I always reach for gel food coloring because it delivers that striking, deep red hue using just a small drop, without adding excess liquid that thins out the cookie dough.
- Chill the shaped dough before filling: I find that popping the pressed dough balls into the fridge for 30 minutes before baking prevents the thumbprint wells from collapsing or spreading flat in the hot oven.
- Re-press the wells if needed: If the cookie centers puff up slightly during baking, I gently press the back of a clean spoon into the warm filling right as they come out of the oven to neat them up.
- Beat the cream cheese thoroughly: I make sure my cream cheese is fully at room temperature and whipped smooth with powdered sugar so the filling pipes smoothly without any lumps.
How to Serve Red Velvet Cheesecake Thumbprints?
Serve these bright, eye-catching cookies neatly arranged on a festive platter alongside cold milk or hot coffee for a cozy dessert spread. Dust the tops of the fully cooled cookies with a light sprinkling of powdered sugar or a shower of fine red sprinkles for an extra festive touch. Pair a cookie with a hot mug of dark roast espresso, a hot chocolate, or a cold glass of milk to complement the subtle cocoa and rich cheesecake notes.
Nutritional Information
Here is an estimated nutritional breakdown per individual thumbprint cookie (based on a 24-cookie yield):
- Calories: 135 kcal
- Protein: 2 g
- Carbohydrates: 16 g
- Fat: 7 g
Make Ahead and Storage
Keep your stuffed thumbprint cookies fresh, soft, and delicious by following these simple storage guidelines.
Refrigerating
Because these cookies feature a dairy cream cheese filling, store them in an airtight container layered with parchment paper inside the refrigerator for up to 5 days.
Freezing
You can freeze the baked and cooled cookies in a single layer on a baking sheet before transferring them to a freezer-safe container for up to 2 months. Thaw in the refrigerator overnight before serving.
Reheating
These thumbprint cookies are best enjoyed chilled or at room temperature so the cheesecake center stays set. If you prefer a soft bite, simply let your cookie sit on the counter for 10 minutes before eating.
Why You’ll Love This Recipe?
Discover why this colorful thumbprint recipe will become an instant favorite in your baking collection.
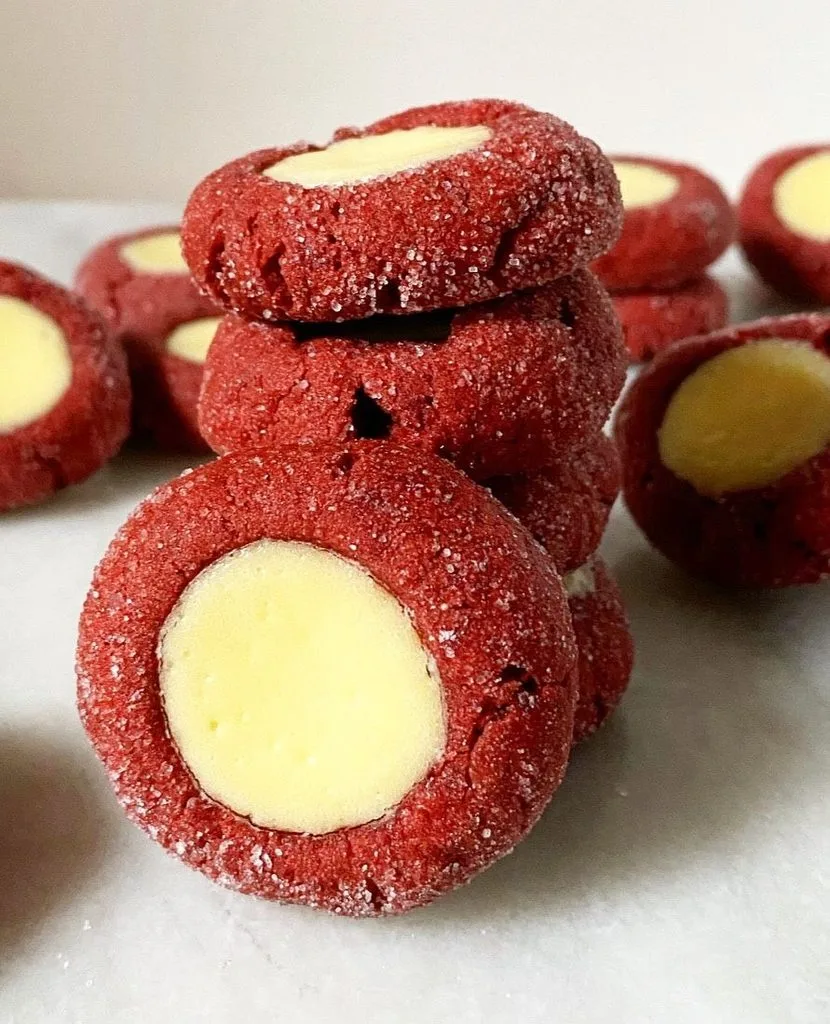
- Striking Visual Appeal: The deep red cookie dough contrasted against the bright white cheesecake filling makes every platter look bakery-worthy.
- Classic Red Velvet Taste: Delivers that beloved balance of mild cocoa, vanilla, and tangy cream cheese in a fun, bite-sized format.
- Simple, Mess-Free Shaping: Using a round measuring spoon to create the thumbprint wells ensures every cookie turns out uniform and easy to fill.
- Great for Holiday Parties: Easy to make in large batches, making them ideal for cookie exchanges, Valentine’s Day, or Christmas gatherings.